


Even here at Best Slow Cooker, we know the holidays call for more than just savory main dishes! While your trusty slow cooker works its magic on a delicious holiday roast or a hearty stew, why not whip up a batch of something truly spectacular and sweet? These enchanting Christmas Pinwheel Cookies are the perfect festive complement to any holiday meal, especially when you need your oven free for other dishes. Imagine the delight on your family’s faces when they see these tender, buttery cookies, each revealing a mesmerizing swirl of vibrant red and classic vanilla. They’re more than just cookies; they’re edible works of art that add a touch of magic to any holiday platter, offering a delightful break from the savory comforts of slow-cooked meals. These pinwheels are a joy to make and share, fostering cherished memories in the kitchen. Their irresistible vanilla flavor, with an optional hint of cocoa in the red swirl, makes them a guaranteed hit for cookie exchanges, Santa’s plate, or simply to fill your home with the sweet aroma of the season. Let Best Slow Cooker help you simplify your holiday cooking while still delivering showstopping treats like these!
Equipment Needed
- Large mixing bowls
- Electric mixer (stand or hand-held)
- Measuring cups and spoons
- Rubber spatula
- Plastic wrap
- Rolling pin
- Sharp knife
- Baking sheets
- Parchment paper or silicone baking mats
- Wire cooling rack
Ingredients
- 1 cup (2 sticks) unsalted butter, softened (for Vanilla Dough)
- 1 cup granulated sugar (for Vanilla Dough)
- 1 large egg (for Vanilla Dough)
- 1 teaspoon vanilla extract (for Vanilla Dough)
- 2 ½ cups all-purpose flour (for Vanilla Dough)
- ½ teaspoon baking powder (for Vanilla Dough)
- ¼ teaspoon salt (for Vanilla Dough)
- 1 cup (2 sticks) unsalted butter, softened (for Red Dough)
- 1 cup granulated sugar (for Red Dough)
- 1 large egg (for Red Dough)
- 1 teaspoon vanilla extract (for Red Dough)
- 2 ½ cups all-purpose flour (for Red Dough)
- ½ teaspoon baking powder (for Red Dough)
- ¼ teaspoon salt (for Red Dough)
- 1-2 tablespoons unsweetened cocoa powder (optional, for Red Dough)
- 1-2 teaspoons red food coloring (gel preferred, for Red Dough)
Shopping List
- Dairy & Eggs: 2 cups (4 sticks) unsalted butter, softened; 2 large eggs
- Pantry: 2 cups granulated sugar; 1 tablespoon vanilla extract; 5 cups all-purpose flour; 1 teaspoon baking powder; ½ teaspoon salt; 1-2 tablespoons unsweetened cocoa powder (optional)
- Baking & Spices: Red food coloring (gel preferred)
Instructions
- **Prepare the Vanilla Dough:** In a large bowl, cream together 1 cup softened butter and 1 cup granulated sugar with an electric mixer until light and fluffy. Beat in 1 egg and 1 teaspoon vanilla extract until well combined. In a separate bowl, whisk together 2 ½ cups flour, ½ teaspoon baking powder, and ¼ teaspoon salt. Gradually add the dry ingredients to the wet ingredients, mixing on low speed until just combined and a soft dough forms. Do not overmix. Wrap the dough in plastic wrap and set aside.
- **Prepare the Red Dough:** Repeat the process for the vanilla dough: cream 1 cup softened butter and 1 cup granulated sugar. Beat in 1 egg and 1 teaspoon vanilla extract. In a separate bowl, whisk together 2 ½ cups flour, ½ teaspoon baking powder, and ¼ teaspoon salt. If using, add 1-2 tablespoons cocoa powder to the dry ingredients for a richer color base. Gradually add the dry ingredients to the wet, mixing until combined. Add 1-2 teaspoons of red food coloring (start with 1 tsp and add more for desired intensity), mixing until the color is evenly distributed.
- **Chill the Dough:** Wrap both the vanilla and red doughs separately in plastic wrap and refrigerate for at least 30 minutes to firm up.
- **Assemble the Pinwheels:** On a lightly floured surface or between two sheets of parchment paper, roll out the vanilla dough into a rectangle approximately 12×10 inches and about ¼ inch thick. Repeat with the red dough, rolling it to the same dimensions.
- **Layer the Dough:** Carefully lay the red dough rectangle directly on top of the vanilla dough rectangle. Gently press down to adhere them.
- **Roll into a Log:** Starting from one of the long edges, carefully roll the layered dough tightly into a log. Ensure the roll is compact and free of air pockets.
- **Chill the Log:** Wrap the dough log tightly in plastic wrap and refrigerate for at least 1 hour (or up to 2 days) until very firm. This step is crucial for clean slices.
- **Preheat Oven & Slice:** Preheat your oven to 375°F (190°C). Line baking sheets with parchment paper or silicone mats. Remove the chilled dough log from the refrigerator. Using a sharp knife, slice the log into ¼-inch thick rounds.
- **Bake:** Place the cookie slices about 1 inch apart on the prepared baking sheets. Bake for 10-12 minutes, or until the edges are lightly golden and the cookies are set.
- **Cool:** Let the cookies cool on the baking sheets for a few minutes before transferring them to a wire rack to cool completely.
Tips & Variations
- **The Chill Factor is Crucial:** Just like some of our best slow cooker recipes benefit from an overnight chill for flavors to meld, these cookies *absolutely* need proper chilling time. A firm dough means clean, sharp pinwheel swirls and cookies that hold their festive shape beautifully.
- **Aim for Uniformity:** For a truly Instagram-worthy swirl, ensure both your vanilla and red doughs are rolled to the same thickness. Precision here pays off in perfectly balanced cookies and even baking.
- **Get Creative with Hues:** While classic red and vanilla screams Christmas, don’t hesitate to personalize! Consider adding green for a tri-color swirl, or experiment with natural colorings for a unique touch. This is your canvas!
- **Flavor Twists for the Win:** Beyond vanilla, a touch of almond extract can elevate the flavor profile, or even orange zest for a bright, citrusy note. Think of it as seasoning, just like we do with our slow cooker dishes – a little extra can go a long way!
- **Roll It Tight, Bake It Right:** When forming your dough log, roll it as tightly as possible. This is the secret to those distinct, beautiful pinwheel patterns without gaps, ensuring every slice is a masterpiece.
Serving & Storage Suggestions
These charming Christmas Pinwheel Cookies are the ideal sweet ending to any holiday meal, especially after a comforting slow-cooked feast from our blog. Present them proudly on a festive platter, perhaps alongside other simple holiday bakes, to create a truly inviting display. They also make a wonderfully personal homemade gift, perfect for sharing the holiday spirit with neighbors or friends – package them in a decorative tin for an extra special touch. Pair these beautiful cookies with a steaming mug of hot cocoa or your favorite coffee for a moment of cozy bliss. Any delicious leftovers can be kept fresh in an airtight container at room temperature for up to a week, or you can freeze them for up to three months to enjoy later. Simply flash freeze the cooled cookies in a single layer before transferring them to a freezer-safe bag, separated by parchment paper, for easy grabbing!
We trust these delightful Christmas Pinwheel Cookies will bring a touch of festive cheer and deliciousness to your holiday season, perfectly complementing the stress-free cooking our slow cooker recipes provide! There’s an undeniable magic in creating and sharing homemade treats, especially when your slow cooker has handled the heavy lifting for dinner. We’d be absolutely thrilled if you whip up a batch of these beauties; please share your photos and tell us how they turned out in the comments below! Your feedback and creative variations inspire us all. Happy baking from your friends at Best Slow Cooker, and Happy Holidays!
Festive Christmas Pinwheel Cookies
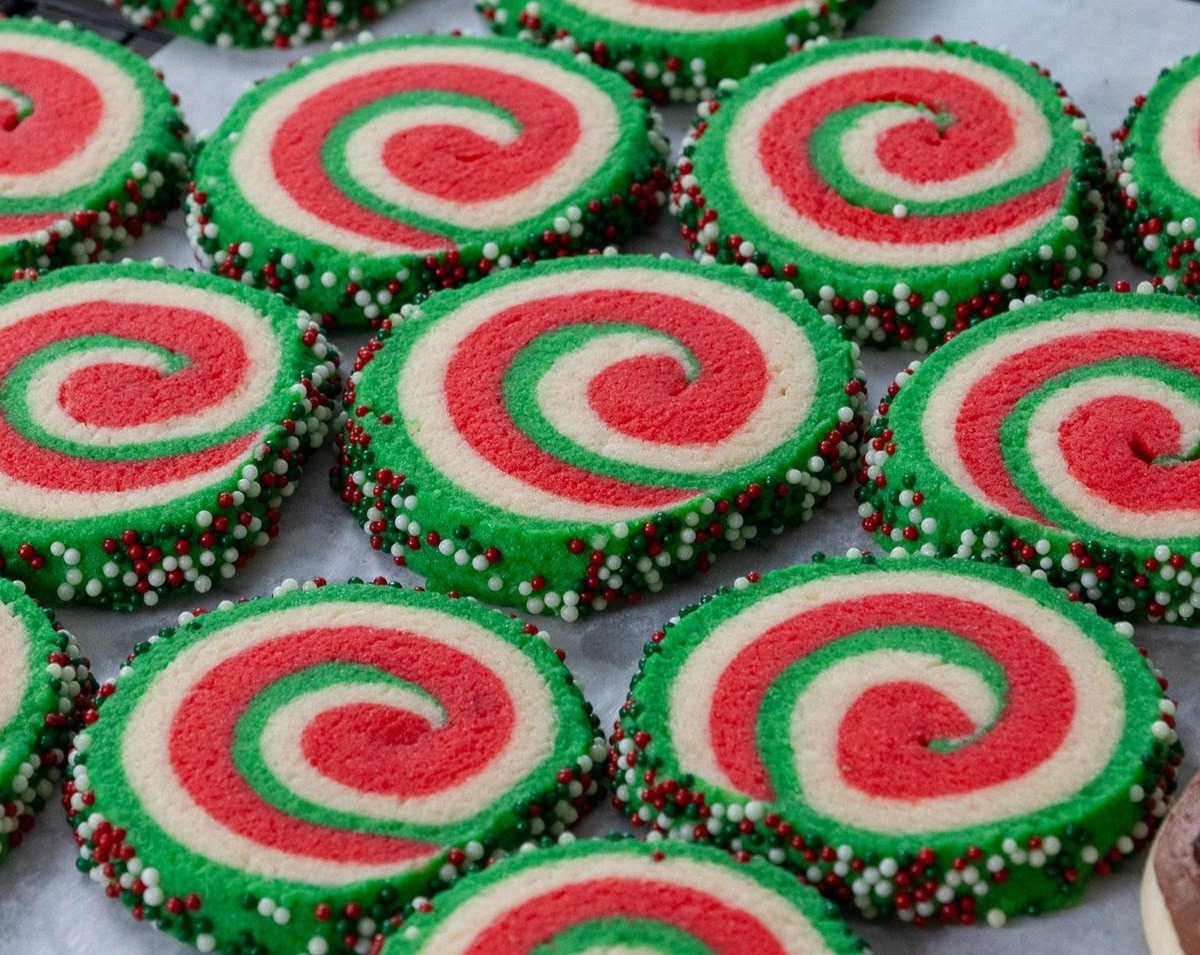
While your slow cooker is handling the main course, these festive Christmas Pinwheel Cookies offer a stunning dessert, featuring vibrant red and vanilla dough swirled into a beautiful, delicious holiday treat.
Ingredients
- 1 cup (2 sticks) unsalted butter, softened (for Vanilla Dough)
- 1 cup granulated sugar (for Vanilla Dough)
- 1 large egg (for Vanilla Dough)
- 1 teaspoon vanilla extract (for Vanilla Dough)
- 2 ½ cups all-purpose flour (for Vanilla Dough)
- ½ teaspoon baking powder (for Vanilla Dough)
- ¼ teaspoon salt (for Vanilla Dough)
- 1 cup (2 sticks) unsalted butter, softened (for Red Dough)
- 1 cup granulated sugar (for Red Dough)
- 1 large egg (for Red Dough)
- 1 teaspoon vanilla extract (for Red Dough)
- 2 ½ cups all-purpose flour (for Red Dough)
- ½ teaspoon baking powder (for Red Dough)
- ¼ teaspoon salt (for Red Dough)
- 1-2 tablespoons unsweetened cocoa powder (optional, for Red Dough)
- 1-2 teaspoons red food coloring (gel preferred, for Red Dough)
Instructions
- **Prepare the Vanilla Dough:** In a large bowl, cream together 1 cup softened butter and 1 cup granulated sugar with an electric mixer until light and fluffy. Beat in 1 egg and 1 teaspoon vanilla extract until well combined. In a separate bowl, whisk together 2 ½ cups flour, ½ teaspoon baking powder, and ¼ teaspoon salt. Gradually add the dry ingredients to the wet ingredients, mixing on low speed until just combined and a soft dough forms. Do not overmix. Wrap the dough in plastic wrap and set aside.
- **Prepare the Red Dough:** Repeat the process for the vanilla dough: cream 1 cup softened butter and 1 cup granulated sugar. Beat in 1 egg and 1 teaspoon vanilla extract. In a separate bowl, whisk together 2 ½ cups flour, ½ teaspoon baking powder, and ¼ teaspoon salt. If using, add 1-2 tablespoons cocoa powder to the dry ingredients for a richer color base. Gradually add the dry ingredients to the wet, mixing until combined. Add 1-2 teaspoons of red food coloring (start with 1 tsp and add more for desired intensity), mixing until the color is evenly distributed.
- **Chill the Dough:** Wrap both the vanilla and red doughs separately in plastic wrap and refrigerate for at least 30 minutes to firm up.
- **Assemble the Pinwheels:** On a lightly floured surface or between two sheets of parchment paper, roll out the vanilla dough into a rectangle approximately 12x10 inches and about ¼ inch thick. Repeat with the red dough, rolling it to the same dimensions.
- **Layer the Dough:** Carefully lay the red dough rectangle directly on top of the vanilla dough rectangle. Gently press down to adhere them.
- **Roll into a Log:** Starting from one of the long edges, carefully roll the layered dough tightly into a log. Ensure the roll is compact and free of air pockets.
- **Chill the Log:** Wrap the dough log tightly in plastic wrap and refrigerate for at least 1 hour (or up to 2 days) until very firm. This step is crucial for clean slices.
- **Preheat Oven & Slice:** Preheat your oven to 375°F (190°C). Line baking sheets with parchment paper or silicone mats. Remove the chilled dough log from the refrigerator. Using a sharp knife, slice the log into ¼-inch thick rounds.
- **Bake:** Place the cookie slices about 1 inch apart on the prepared baking sheets. Bake for 10-12 minutes, or until the edges are lightly golden and the cookies are set.
- **Cool:** Let the cookies cool on the baking sheets for a few minutes before transferring them to a wire rack to cool completely.
