

Step-by-Step Instructions
- Bake the cake according to package directions in a 9×13 inch baking pan. Allow it to cool completely.
- Once cooled, crumble the entire cake into a large mixing bowl. Make sure there are no large lumps.
- Add about 3/4 of the can of cream cheese frosting to the crumbled cake. Mix with a spatula or your hands until well combined and the mixture can be rolled into a ball without crumbling. Add more frosting if needed, a tablespoon at a time.
- Roll the cake mixture into 1.5-inch balls (about 1 oz each) and place them on a parchment-lined baking sheet. Chill the cake balls in the refrigerator for at least 30 minutes, or freezer for 15 minutes, to firm them up.
- Melt the white candy melts in a microwave-safe bowl in 30-second intervals, stirring in between, until smooth. If too thick, stir in coconut oil or shortening a teaspoon at a time.
- Dip the tip of each lollipop stick into the melted candy, then insert it about halfway into a chilled cake ball. This acts as a ‘glue’. Repeat for all cake balls and chill again for 5-10 minutes to set the glue.
- Dip each cake pop into the melted white candy, ensuring full coverage. Gently tap off any excess candy coating by lightly tapping the stick on the edge of the bowl.
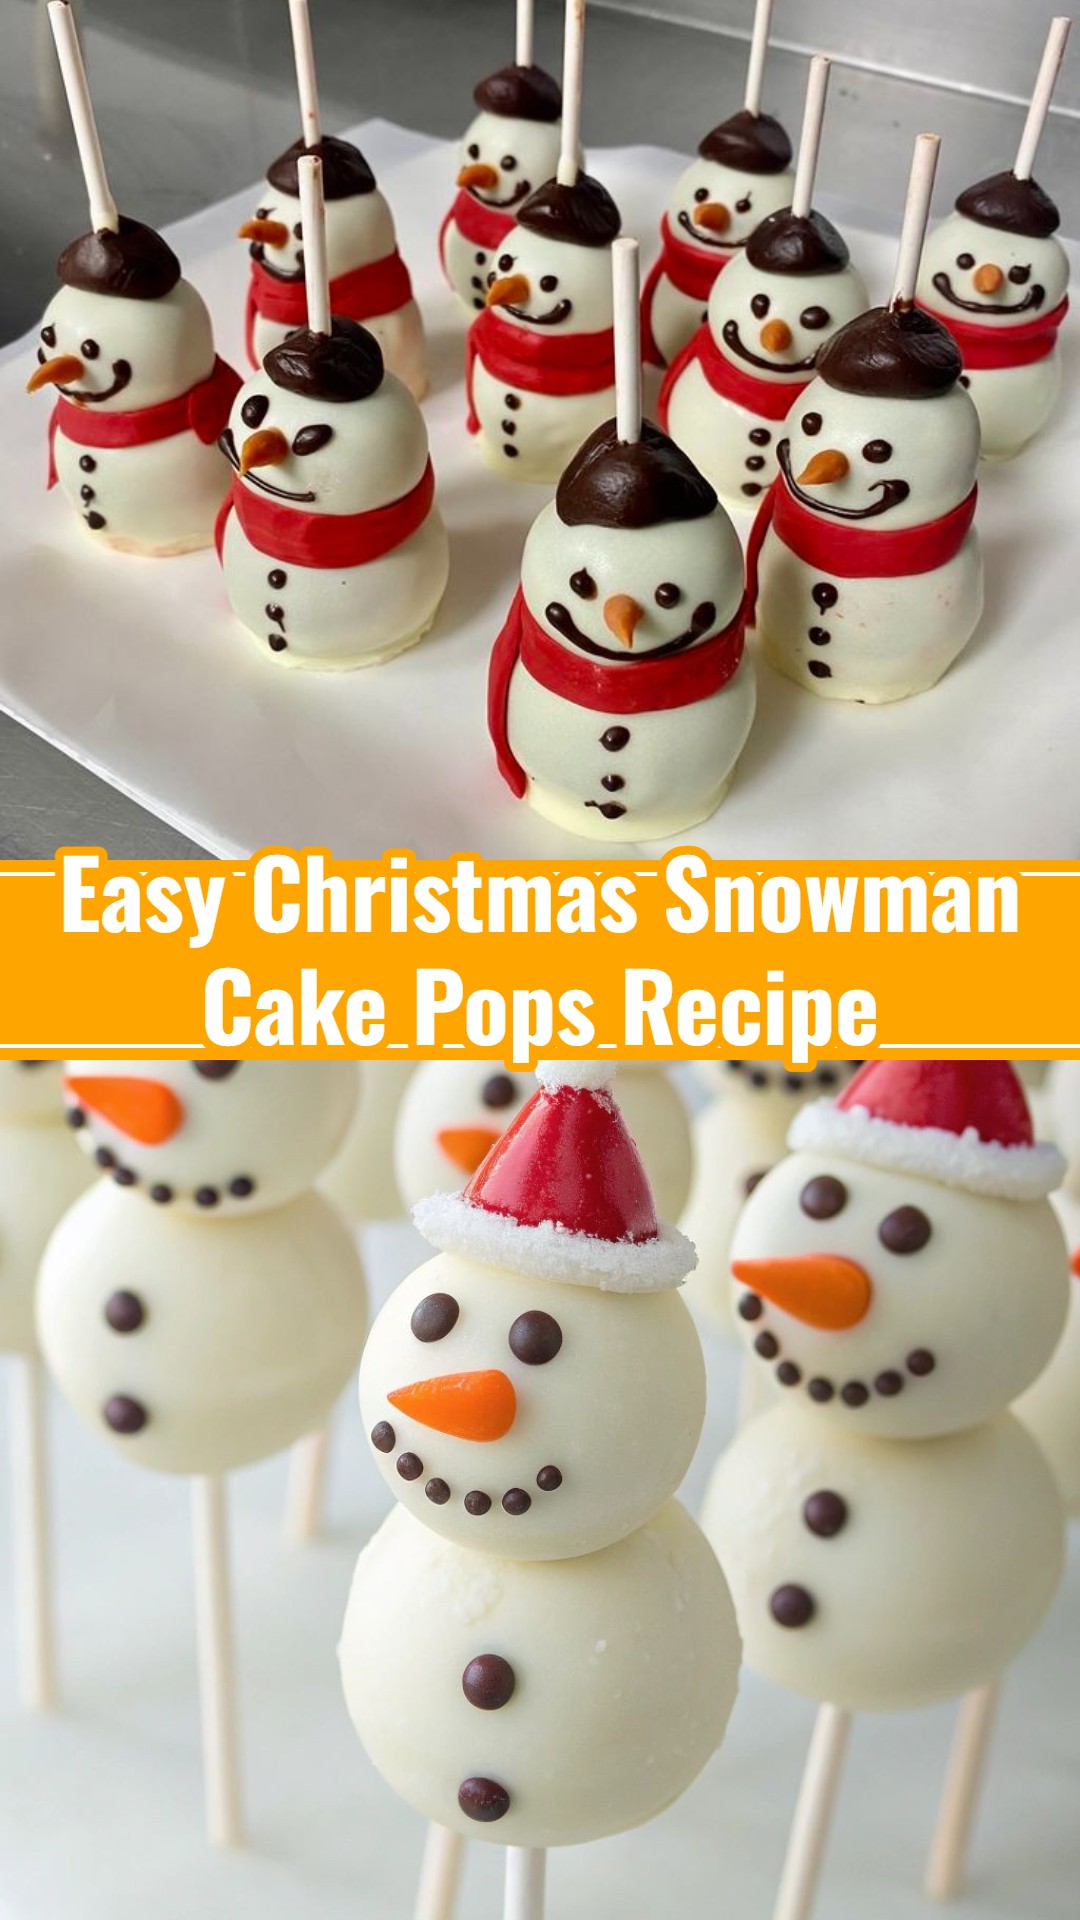
- While the coating is still wet, quickly decorate to create your snowman. Use mini chocolate chips for eyes and buttons, an orange sprinkle or candy for the nose, and a piece of red licorice lace for a scarf. You can also add sprinkles for a hat.
- Place the finished cake pops in a styrofoam block or a tall glass to dry completely. Allow at least 15-20 minutes for the coating to set.
- Once set, they are ready to be served or stored.
Full Ingredients
- 1 box (15.25 oz) vanilla or white cake mix (plus ingredients required on box: eggs, oil, water)
- 1 can (16 oz) cream cheese frosting (or your favorite buttercream)
- 24 oz white candy melts
- 2 tbsp coconut oil or shortening (optional, for thinning candy melts)
- Mini chocolate chips (for eyes and buttons)
- Orange sprinkles or small orange candies (for noses)
- Red licorice laces or thin red candies (for scarves)
- Various sprinkles (for hats or extra decoration)
Shopping List
- Pantry: 1 box vanilla or white cake mix, 1 can cream cheese frosting, 24 oz white candy melts, Mini chocolate chips, Orange sprinkles, Red licorice laces, Various sprinkles, Coconut oil or shortening (optional)
- Dairy & Eggs: Eggs (as per cake mix instructions)
- Oils: Vegetable oil (as per cake mix instructions)
Equipment Needed
- 9×13 inch baking pan
- Large mixing bowl
- Hand mixer or stand mixer
- Rubber spatula
- Cookie scoop (optional, for even sizing)
- Lollipop sticks (6-inch)
- Microwave-safe bowls or double boiler
- Styrofoam block or tall glass (for drying)
- Parchment paper or wax paper
Variations & Serving Ideas
These charming Christmas Snowman Cake Pops are the ultimate festive statement, ideal for any holiday occasion from a casual family get-together to a sophisticated Christmas party, or even a fun-filled Christmas birthday celebration. Present them creatively by standing them upright in a decorative styrofoam block covered with festive fabric, arranging them in a collection of holiday mugs, or showcasing them elegantly on a tiered dessert stand to truly impress your guests. They are a delightful accompaniment to a steaming mug of homemade hot chocolate, a spiced cider, or a vibrant holiday punch. For optimal freshness, store any leftover cake pops in an airtight container at cool room temperature for up to 2-3 days, or extend their life by refrigerating them for up to a week. For longer enjoyment, they can be frozen for up to a month; simply thaw them in the refrigerator before serving to maintain their perfect texture and flavor.
We hope these delightful Christmas Snowman Cake Pops bring an extra sprinkle of joy and a whole lot of deliciousness to your holiday season! They truly embody the spirit of festive fun and effortless entertaining. Give them a try and let us know in the comments how your snowman masterpieces turned out and what creative touches you added. Happy holiday crafting and feasting! #HolidayBakingEasy #ChristmasThemedSnackIdeas #EasyBakingRecipesChristmas #ChristmasIdeasBaking #ChristmasFoodHacks #SimpleChristmasBakingForKids #FoodForAChristmasParty #ChristmasBirthdayPartyIdeasForTeens #ChristmasTreatsNoBake
